
Stick Welding[1] is considered as the first procedure to emerge in the industry. In spite of its long history, the welding process still gains huge popularity along with other counterparts like MIG or TIG.
This article is essentially all about stick welding. I will walk you through the following contents:
- What is Stick Welding and its basic elements?
- Advantages and Disadvantages of Stick Welding.
- Step-by-step tutorial on how to perform Stick Welding.
- Safety recommendations for Stick Welding.
- A brief comparison between the “trio” (TIG, MIG, Stick).
Let’s join us on this amazing journey, right NOW!
What Is Stick Welding?
Stick Welding, also known academically as “Shielded Metal Arc Welding” (SMAW), is defined as a welding process that utilizes electricity to melt both the electrode (rod, stick, metal filler) and the metal joint to fuse metal pieces together.
Stick Welding is actually a slang term which is very popular in the welding industry. The name represents the iconic “stick” shape of the electrode used in the welding process.
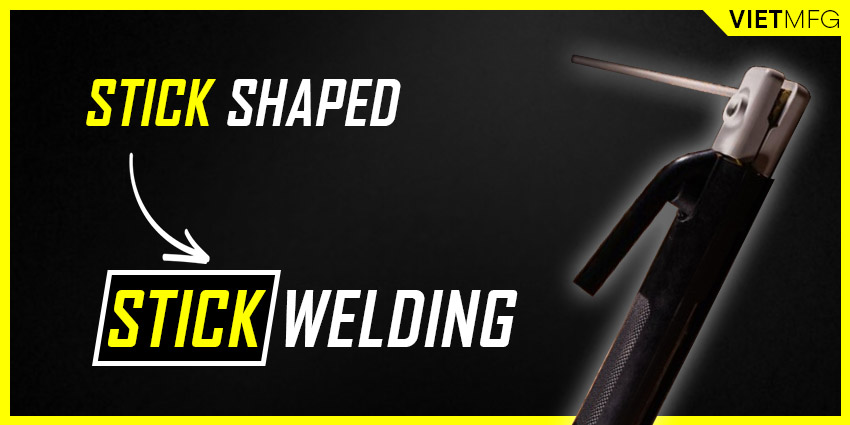
Stick welding rod[2] is the central object of this particular process, as it determines many relevant factors.
The rod features a layer of flux. Under the heat generated from electricity, the layer melts and protects the weld pool from airborne contaminants.
However, the melting flux forms another headache by-product: a layer of slag located on top of the bead. This slag must be removed after welding via brushing or chipping it off.
This slag removing task is iconic of the stick welding process. If you find a welder brushing something after the welding is complete, then it is sure that he had just performed stick welding.
Another aspect of stick welding is the type of power supply, whether AC or DC. Stick welding is applicable to both types, depending on the rod you use. Read on, as details about AC and DC Stick Welding will be discussed later in this article.
Stick welding is not very challenging for beginners to learn. Of course, the level of difficulty depends largely on what you want to achieve with stick welding.
- If you wish to do some general repairs, such as stick welding stainless steel[3] , then a 5-hour practice is more than enough for you to fix a broken tractor fender, for example.
- An entry-level welder would require a minimum of 500 hours of practicing.
- If you want to pass the intermediate threshold, prepare to pick up around 900 hours of training.
- The top level, which means career-pursuing level, would take you about 18 to 24 months of proper training and practice.
History of Stick Welding
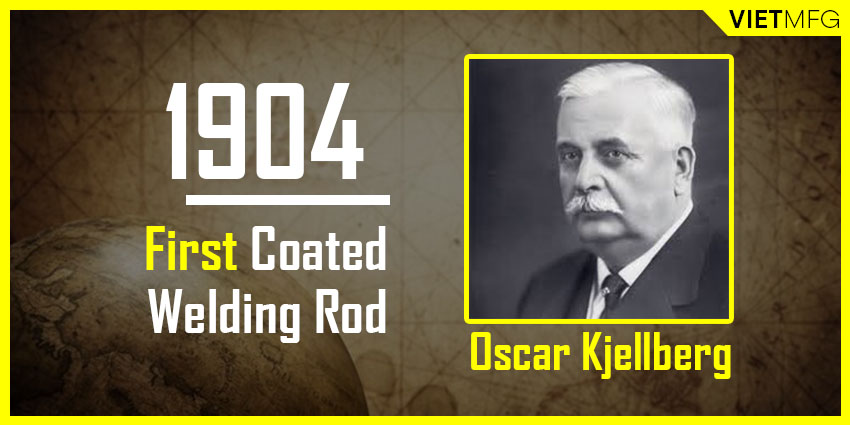
Stick Welding has quite a long history, dating back to the dawn of the twentieth century.
The year is 1904, when Oscar Kjellberg came up with the world’s first coated welding rod.
He performed the process by dipping a metal filler wire into a binder made from mainly cellulose, wood pulp and silicate.
The basic principle of this process centers around the coated electrode. This electrode coating’s function is:
- Forming a shield for calcium carbonate (CaCO3) to decompose into CaO and CO2 under the effect of heat.
- Creating slag, which helps the removal of contaminants from the molten deposit.
- Stabilizing the arc through the application of sodium and potassium.
- Providing filler metal to the weld pool.
Fast forward over 100 years, the welding industry has experienced revolutionary advances in metallurgy, electrode coating formation, and production techniques.
However, the core principle in Kjellberg’s process remains.
It is the foundation for our popular Stick Welding nowadays.
In fact, over 20 percent of the metal filler market is the Stick Welding Electrodes, which is estimated around 150-200 million pounds in North America.
The figure proves that Stick Welding is a popular choice in the industry, thanks to its various benefits.
Advantages and Disadvantages Of Stick Welding
Stick Welding is a widespread concept in the welding industry. This can be explained by its dominant advantages of the process. However, it is still subjected to certain drawbacks.
Let’s take a look at “the good” and “the bad” of Stick Welding.
| Advantages of Stick Welding | Disadvantages of Stick Welding |
| High portability | Long training cycles |
| Weld in all positions | Slow travel speed |
| Affordable cost | Low electrode efficiency |
| Excellent outdoor application | Advanced skills required |
| Simple equipments and simple setup |
1. Advantages Of Stick Welding
High portability is the first advantage of Stick Welding. By using a layer of flux in replacement of shielding gas, you are free from carrying heavy and clunky gas cylinders around. All you need is a couple of filler rods, and you are ready for the stick welding process.
SMAW is capable of welding in all positions. Regardless of running your bead in horizontal, vertical or overhead position, everything is possible if you select the appropriate electrodes for that particular welding position.
You will never find another welding process that is as affordable as stick welding. Unlike its counterparts like TIG or MIG, a quality stick welder produced by a reputable company only costs around $500.
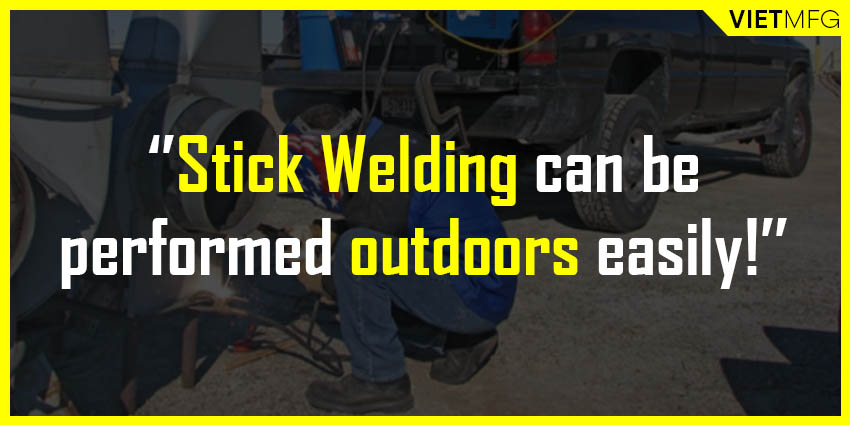
Stick welding is so popular as it can be performed outdoors easily. Without the use of shielding gas, stick welding is immuned to wind factor. It can be perfectly applied for any outdoor condition.
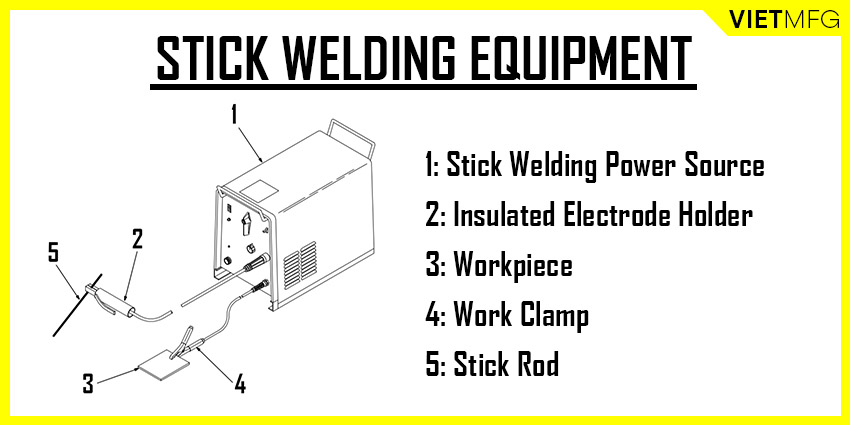
Simple equipment and easy setup are considered the strongest benefits of stick welding. This process demands only five basic tools: welder with constant current power source, insulated electrode holder, work clamp, workpiece and the stick rod.
2. Disadvantages Of Stick Welding
One obvious drawback of Stick Welding is its long training cycle. As mentioned above, to earn decent money with a proper stick welding job, you will need approximately 18-24 months of training.
Too slow a process is also a bad point of Stick Welding. You can not perform the process at a fast pace because you have to continuously reload the filler rod, as it melts into the metal joints rapidly. This leads to the low electrode efficiency in Stick Welding.
Another disadvantage of Stick Welding lies in its demand for advanced skills from the operators. The difficult part is that you, the operators, must maintain the stick electrodes at a constant length from the metal to prevent its burnout.
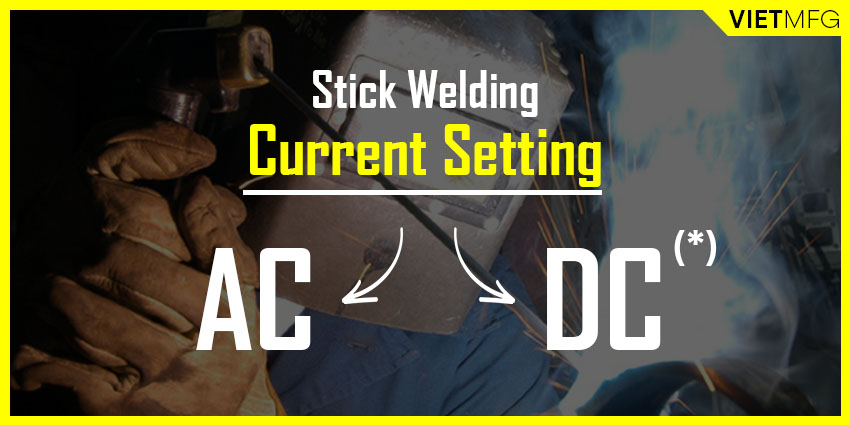
AC vs DC Stick Welding
Stick Welding can go with both AC and DC current settings, depending on the type of electrode applied, and your welders.
In most cases, the DC setting gains more popularity.
But no matter which type you use, power supplies of stick welding must be the constant voltage type (or CV). CV refers to the voltage staying the same value during the welding process, while amperage changes according to the arc length.
1. DC Stick Welding
DC can be applied for the majority of hobbyist’s simple tasks, as well as heavy industrial jobs.
DC Stick Welding presents many advantages, such as more stable arcs with less spatter. It is also easier to initiate the welding process, especially in vertical up and overhead positions.
However, DC polarity has one drawback relating to arc blow. It is caused by the magnetism of the metal workpiece.
There are 2 subtypes of DC Stick Welding: DC positive (DCEP) and DC negative (DCEN).
How you connect your stick holder and ground clamp will determine the polarity of your DC setting:
- If you connect the stick holder to the positive terminal (+), and the ground clamp to the negative terminal (-), you are welding with DC positive.
- If you choose the setup in the opposite way with the stick holder to the negative terminal (-), and the ground clamp to the positive terminal (+), you are welding with DC negative.
The following table will reveal some comparisons between the two DC subtypes:
| DCEP | DCEN |
| Stick Electrode is positively charged, and your workpiece is negatively charged. | Your workpiece is positively charged, and Stick Electrode is negatively charged. |
| The current flows from the workpiece to the Stick Electrode. | The current flows from the Stick Electrode to the workpiece. |
| The workpiece receives more heat and penetration, especially steel workpiece. | The heat is focused more on melting the Stick Electrode (better deposition rate), rather than the workpiece. This results in less penetration and less heat on the workpiece. |
| Suitable for applying on thicker sheet metal, thanks to the deeper penetration profile. | Suitable for applying on thin sheet metal to prevent burn-through defects. |
| The molten droplet size is small (as there is less current concentration on the Stick Electrode), leading to less spatter. | The molten droplet size is big and of irregular shapes (as there is more current concentration on the Stick Electrode), leading to more spatter. |
| More popular | Less popular |
2. AC Stick Welding
AC setting is rarely applied, but it still proves useful under special cases when your power supply is far away from the work area.
Essentially, AC polarity is the combination of ½ DC positive and ½ DC negative.
Thus, it possesses all features of both settings, but at a middle level.
AC Stick Welding usually happens when the only available option for power supply you have is AC.
Most of the time, affordable welders for entry-level tasks, also known as “buzz box” machines, provide just that.
Moreover, the application of AC polarity helps prevent problems with arc blow, which happens when you choose DC setting.
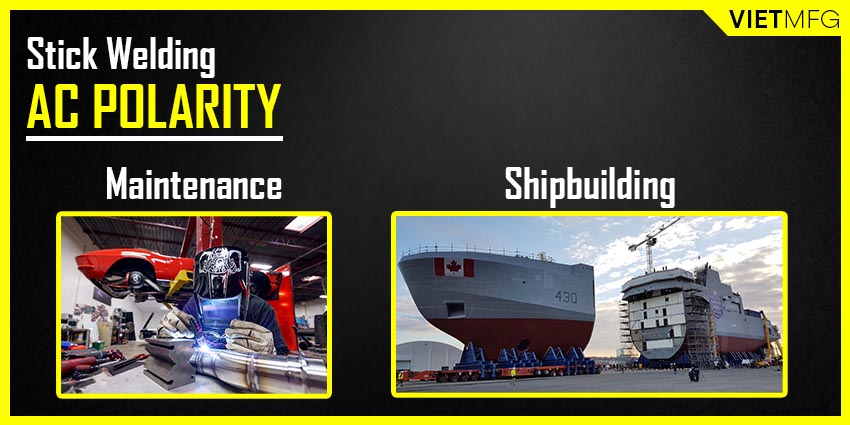
Shipbuilding is the industry that uses many AC Stick Welding, as it involves a lot of corner welding and more arc blow issues.
Maintenance and repair jobs also apply AC polarity. These jobs require the welding process on many machines which are magnetized.
As mentioned earlier, the choice between AC or DC Stick Welding depends on the selection of electrode.
As DC is more popular, if you want to go with AC, make sure to inform your supplier in buying an AC Stick Welding Electrode.
Some common options include: 6011, 6013, 7018 and 7024.
Basic Stick Welding Equipments
Stick Welding is the most simple process to perform, if you take a look at its required equipment.
All you need for Stick Welding are five components:
- A CV (constant voltage) power supply stick welder.
- An electrode (rod) holder.
- A stick welding electrode to perform the welding process.
- A ground clamp.
- Slag removal tools: a chipping hammer and a wire brush.
One thing to note is the amperage level of the stick welder.
As it is the constant voltage type, the question is how much amperage do we need for Stick Welding
Basically, an experienced operator can stick weld almost everything at 150 amperes.
Making multiple passes is also possible with stick welding to bring about a desired weld.
However, remember that as you use higher amperage, you should lower down the number of passes.
How Does Stick Welding Work?
Here is a sequential description of how Stick Welding works:
- Firstly, you plug your electrode holder and ground clamp to the power supply.
- Then, you connect the ground clamp from the welder to the metal workpiece.
- The next step is to insert the stick rod into the holder.
- Start off by striking like a match at the spot that you want to start your stick welding process.
- You will see the stick rod ignites and deposits filler metal into the weld joint.
Let’s take a more detailed look on the working principle of Stick Welding.
- When you strike the stick rod, the circuit is complete and electricity from the welder runs through the rod at the contact point.
- It boosts the temperature up to 7,000° Fahrenheit.
- Under such high heat, the stick rod starts to melt down and so does its surrounding coating.
- The coating forms a shield to prevent any airborne contamination from entering the weld.
- This is the reason why Stick Welding gets its official name as Shielded Metal Arc Welding (SMAW).
- Then, as the operator moves the rod along the workpiece, it continues to be melted.
- Eventually, the weld joint is filled.
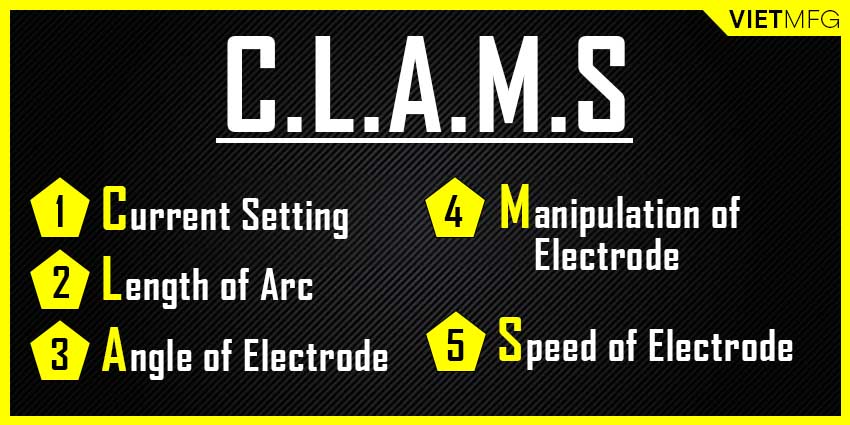
Five Basic Variables (CLAMS) With Recommended Stick Welding Tips
Based upon the principle mentioned above, we need to be aware of the following five variables.
They are shortly called CLAMS, which include:
- Current setting.
- Length of arc.
- Angle of electrode.
- Manipulation of electrode.
- Speed of travel.
Each variable will be explained thoroughly in this section, together with some stick welding tips for you to try on your next run.
1. Current Setting
Current setting refers to both: (a) the choice between AC and DC, and (b) the amperage level.
These two configurations can be set on the power source control of the welder.
With regard to AC vs DC, here is a quick review: DC offers about 10 percent more penetration at a given amperage than AC, while DC negative welds thinner metals better.
About the amperage level, it is best to follow the instruction of the electrode manufacturer.
A simple rule of thumb is to use 1 amp for each 0.001 inch of rod diameter.
For example, a 1/8 inch diameter (0.125 inch) would require the starting amperage level at 125 amperes.
Of course, it is not the exact required number. You can use an additional 5 – 10 amperes, depending on your applied techniques.
There are some signs to determine if your amperage is incorrectly set:
- If you find your electrode becomes sticky during your arc starting, even if your arc length is well maintained, then your amperage is below the optimal range.
- But if you manage to get your arc going and you see the puddle is so hard to control, or if you hear louder sounds, then your amperage is definitely way too high.
- Too high the current level can degrade the electrode’s covering flux, which leads to lower shielding function.
2. Length of arc
Length of arc means the distance between the stick rod and your weld puddle.
The optimal range for arc length is the same as the stick electrode diameter, which fluctuates from 1/16 – 3/32 inch.
Remember that the arc length must not exceed the rod diameter (the actual metal composition inside the flux layer).
If you apply an arc length that is too small, or too large, you would entail varying effects.
- A too small arc length would decrease the welding voltage, causing the electrode to freeze faster and producing a high-crown bead. There is also greater risk of sticking your electrode into the weld puddle.
- A too excessive arc length would rocket your voltage, producing lots of spatter. It also involves lower deposition rates, and creates undercuts and porosity in your weld.
When first trying out with stick welding, do not freak out if you find yourself doing a too long arc length.
This is completely normal, as long arc length means better view of your puddle.
However, try to adjust your body position to have a better look at your weld, while maintaining the optimal arc length.
This practice would certainly make you a more professional stick welding operator, with improved bead appearance and lower spatter production.
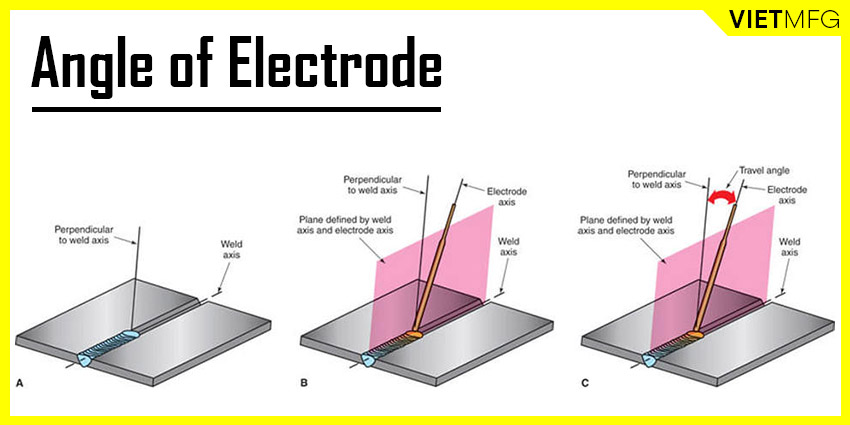
3. Angle of electrode
Angle of electrode obviously refers to how tilted your electrode is from the surface perpendicular to your weld path (weld axis).
A simple rule is to drag the stick rod at a 5 – 15 degree angle for flat, horizontal and overhead positions (backhand technique); and to push the stick rod at a 5 – 15 degree angle for vertical up welding (forehand technique).
4. Manipulation of electrode
Manipulation of electrode implies the technique applied by the operator, which is different from one person to another.
Various choices of electrode type, welding position, weld joint characteristics and amperage may require different manipulation techniques as well.
For example, if your workpiece’s thickness is 1/4 inch or thinner, you probably do not need to employ the weaving technique, as it would produce a bead that is too wide. In that circumstance, a simple straight bead is all that is required.

On the contrary, stick welding on thicker materials would demand a more complicated electrode manipulation. Drawing a continuous series of partially overlapping circles in a zig zag, or stutter-step pattern is more efficient. Remember to control your side-to-side motion to a maximum two times of the electrode core’s diameter.
It is a different story with vertical up welding position. If the project requires more focus on the sides of the joint, you should move across the joint’s middle area slowly so that the weld puddle can catch up. Then, pause for a little bit at the sides to allow the solid tie-in to the sidewall to happen.
5. Speed of travel
Speed of travel adjustment can certainly change the puddle width, which should be about 1.5 to 2 times of the rod diameter.
To determine the optimal travel speed, firstly, you need to initiate a weld puddle of the desired diameter. After that, move your electrode at a speed that keeps you in the leading one-third of the weld puddle.
Moving too slow would produce a wide and convex bead with poor penetration profile.
It also concentrates your heat backwards into the puddle, and not the workpiece itself, which would result in the incident of cold lap (or poor fusion).
On the other hand, moving your electrode at the running speed of Super Sonic would do no good also. It could lead to a narrower and highly-crowned bead, with the possibility of undercut and underfill. In that case, the outside area of the weld would be in a concave shape.
What Can Be Welded With Stick Welding?
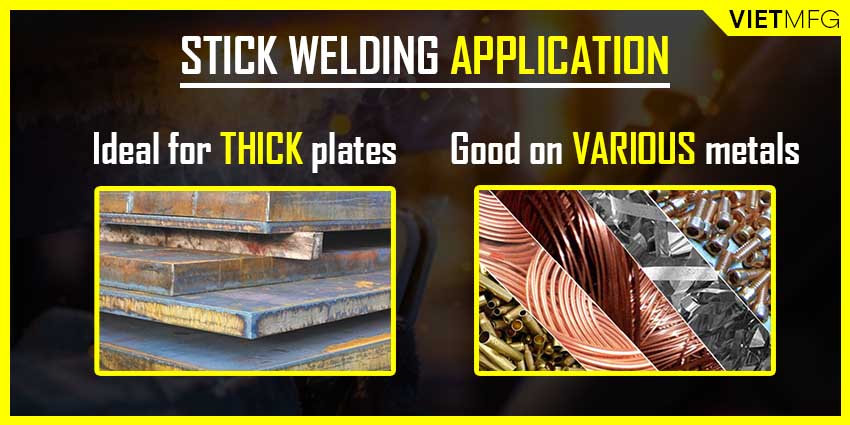
Stick Welding is preferred more on thicker metals, and obviously not a good candidate for dealing with thin objects. Any part with thickness over 1/16 inch is ideal for this welding process.
Some popular applications of stick welding include fixing agricultural equipment, repairing tractors, building vessels, constructing power plants, and welding pipe.
Regarding metallic type, stick welding works well on a variety of options. Anything among stick welding cast iron[4] , stainless steel, mild steel (ferrous), and aluminum, copper, nickel-based alloys (non-ferrous) is absolutely fine.
However, be more cautious when stick welding aluminum[5] . I believe it is not a surprise, as this metallic type is a huge challenge for every welding process.
Step-by-step Tutorial On Stick Welding
In this section, we will guide you through every single task for a successful stick welding process. This step-by-step tutorial includes five following core parts:
- Preparing your weld joint.
- Selecting the correct stick electrode.
- Setting up your stick welder.
- Initiating an arc.
- Employing the appropriate welding technique.
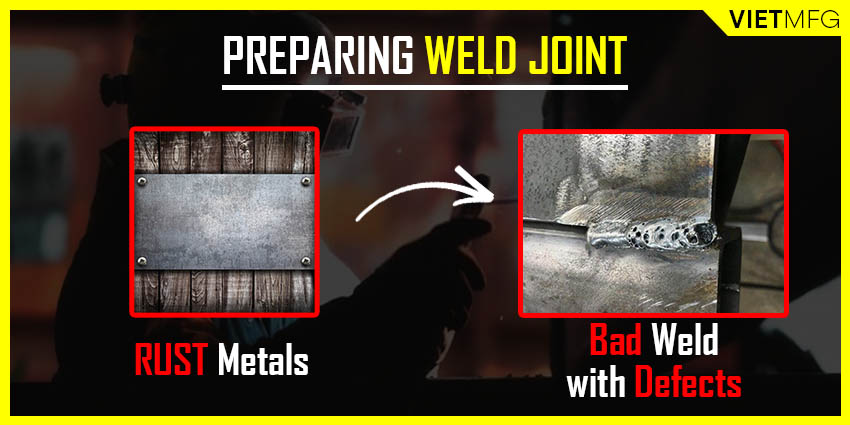
1. Preparing Your Weld Joint
Stick welding can be the most forgiving process when dealing with rusty or dirty metal. However, it does not mean that cleaning your weld joint in advance is unnecessary.
The welded metal should be clean from rust, oil, mill scale and especially water. Even a small amount of them present in your workpiece can weaken your weld and creates a terrible weld bead appearance. Moreover, contaminated conditions can cause many defects, including porosity, cracking, and lack of fusion.
This is why even the best welders emphasize the importance of weld joint preparation. You might have heard some veteran welders say something like “If it is not clean, do not ever touch it!”.
So, what should we do to clean the workpiece effectively?
Use a wire brush to get rid of all the contaminants and grime first. As a rule of thumb, make sure to grind the metal piece of 2’’ back. This helps you prevent those defects mentioned above.
Next, clean your work clamps also to ensure a firm electrical connection. Without it, your arc welds will surely look bad.
2. Selecting Stick Welding Rod
Everything about stick welding rod and how to select the appropriate one for your application is all presented in another article. Make sure to check it out!
3. Setting Up Stick Welder
The simplicity of stick welding process lies in the stick welder setup process. All you need to do is plug the electrode holder (or stinger) to the positive terminal, and connect the ground cable to the negative cable to have the DCEP current setup. It works 99 percent of the time.
4. Initiating An Arc
Even before striking an arc, you should do this one important thing: Get yourself as comfortable as possible. Use two hands to hold the stinger, and find the stance that provides you with both clear vision and easy control.
Once you are comfortable and ready, it’s high time to initiate the welding arc. Indeed, this task is quite challenging for beginners.
The ultimate way to strike an arc is to do it like lighting a match. Point the tip of the stick rod against the workpiece and start dragging it along across. Whenever you see an arc is formed, lift the rod up and pull away slightly. Be careful when lifting the stick rod up. Lifting it too high would cut out your newly-formed arc.
You will also hear some sizzling sounds as the arc appears. If you find the sound too aggressive, consider lowering the amperage level down.
However, if you set amperage too low, you may find your rod sticking to the workpiece or the flux coating being chipped off, which ruins a small part of your rod. This is completely normal for novice welders, and you can learn to fix the chipped flux.
To fix it, you need a piece of scrap metal. Hold the stick rod about 1/4″ away from the metal piece and strike an arc. Maintain the arc length until the heat burns your rod into a good and undamaged shape again. Next, scrape the rod and remove the flux coating. And your stick rod is ready for use again.
5. Employing Appropriate Stick Welding Techniques
There are three popular welding patterns that are applicable to the stick welding process. They are:
Whipping the stick rod
This technique involves moving forward and backward continuously along the weld. This motion can greatly remove contaminants in your welds. Thanks to this feature, the whipping technique is preferred for dealing with dirty weld joints.
The pattern is also a great choice for thin metals in fillet welds, or open root welds.
It works best with electrodes having little or no flux coating. This helps prevent flux being trapped in the weld area.
Moving the stick rod in circular motion
Circling pattern is very versatile, which means it can adapt well with many types of stick welding rods.
Beginners to stick welding process can start off by employing this simple technique, as it helps a lot with the controlling issue for the welders.
Weaving the stick rod from side to side
Weaving is typically employed for wider welds. Narrow welds are also applicable with a very small motion.
All you need to do is strike an arc, hold one side for one or two seconds, and then move over to the other side of the joint and then hold it for another one or two seconds. Keep repeating the motion along the weld joints, and that’s it!
This technique requires many hours of training to perfect it. By using a weaving pattern, you can achieve the stunning final weld appearance.
However, a weaving motion should not be employed for thick materials (over 1/4″) as it can produce a wider weld bead than necessary.
Safety Guidelines For Stick Welding
Conducting stick welding, or any type of welding, without proper safety apparatus will seriously get you in great danger. Unsafe welding can even kill you. Hence, consider safety your top priority.
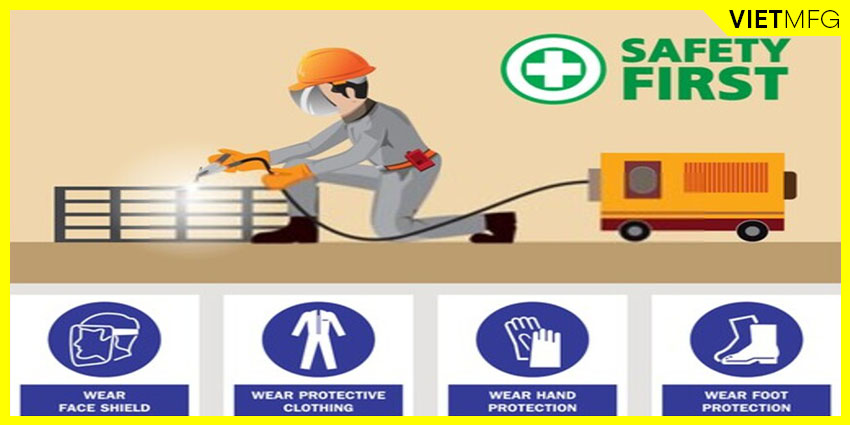
The number one thing you need to prepare is get protective clothing and equipment.
Next, install a proper ventilation system for your welding area, if it is in a confined space. Welding fumes are extremely lethal.
Below is the list of essential safety equipment that you should furnish your working place with:
- Welding helmets.
- Leather welding gloves.
- Leather welding jackets or long-sleeve shirts.
- Non-flammable welding pants.
- Fire-proof boots.
- Ventilation fan, if welding process produces toxic fumes.
- Fire extinguisher, if flammable objects are nearby.
One of the biggest mistakes in preparing safety equipment is the use of sneakers. You will regret ever wearing sneakers into your stick welding process. Molten metal will fall down and dig a hole on your shoes’ top. And there is nothing you can do about it. All there is to do is wait for the burn to cool down and remove it.
Without proper preparation of safety gears for the stick welding, you will likely be injured. The most typical injury in stick welding is called “flash”. It is caused by the UV radiation created by the stick welding rod. It is similar to getting a sunburn.
All in all, if you pick up welding, my top suggestion is to consider safety as the top priority. Get safety equipment properly to ensure your welding success.
Comparison Between Stick, TIG and MIG Welding
The most obvious difference between stick and TIG, MIG welding is the application of external shielding gas. Stick welding requires no bulky shielding cylinder. It uses an internal source of shielding composition from the flux coating of the stick rod.
Stick shares one same feature with TIG by applying Constant Voltage power source, while MIG employs Constant Current power supply. Therefore, MIG power supply is not compatible with stick and TIG welding.
Another unique feature that sets three welding processes apart is the way filler metal is deposited into the weld puddle. MIG uses a wire feed system, instead of a separate filler rod like TIG. On the other hand, stick welding uses its stick electrode as the filler metal (consumable electrode).
Conclusion
In comparison with contemporary welding processes, stick welding might seem a little bit obsolete.
However, stick welding always proves its effectiveness, thanks to its simplicity and beginner-friendly procedure.
We hope our article has provided you with informative knowledge about Stick Welding.
Remember to check out our other content for more cool welding processes.
Reference
- Stick Welding. Go Welding. Retrieved December 23th 2020.
- Stick electrode and welding basics. The Fabricator. Retrieved December 23th 2020.
- STICK WELDING 101: GETTING STARTED WITH SMAW. Weld.com. Retrieved December 24th 2020.
- Five Steps to Improving Your Stick Welding Technique. Miller. Retrieved December 24th 2020.
- How to Stick Weld Basics For Beginners – Arc Welding and Electrodes Explained. Welding Pros. Retrieved December 24th 2020.
- The ABC’s of Arc Welding. Kobelco. Retrieved December 24th 2020.
- AC vs. DC. Welding Productivity. Retrieved December 25th 2020.
- STICK WELDING 101: Getting Started with SMAW. Youtube (Weld.com channel). Retrieved December 24th 2020.

