MIG Welding is considered one of the easiest welding procedures to learn.
However, there are still tons of things you need to know about MIG Welding.
Here at our website, we have prepared a full and unique walkthrough for you about the topic, including:
- What MIG Welding is all about (its definition, background, components and step-by-step process).
- Certain tips and tricks to perfect your MIG welding skills.
- Safety guideline for MIG welding.
Alright! Let’s dive right in!
What is MIG Welding all about?
1. Fundamental knowledge about MIG Welding
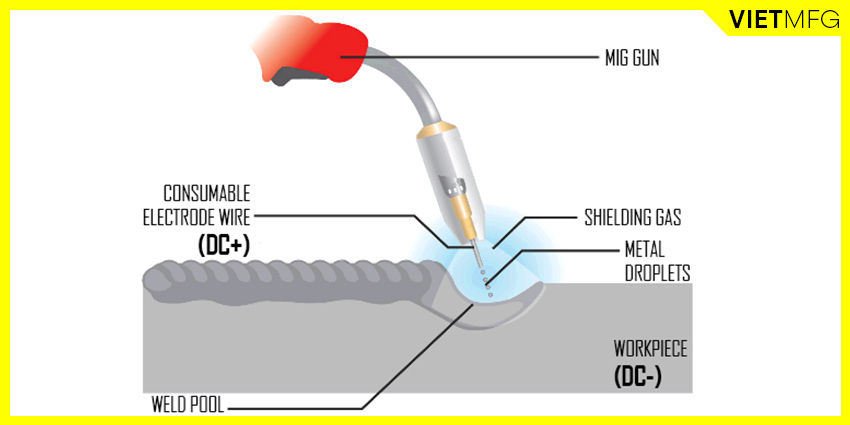
MIG, which stands for Metal Inert Gas, is a welding process which utilizes heat from a DC electric arc to join metals.
The electric arc is created between the workpiece (negative pole, cathode, DC-) and a consumable bare electrode wire (positive pole, anode, DC+).
The consumable electrode wire is continuously fed into the weld puddle via a MIG gun.
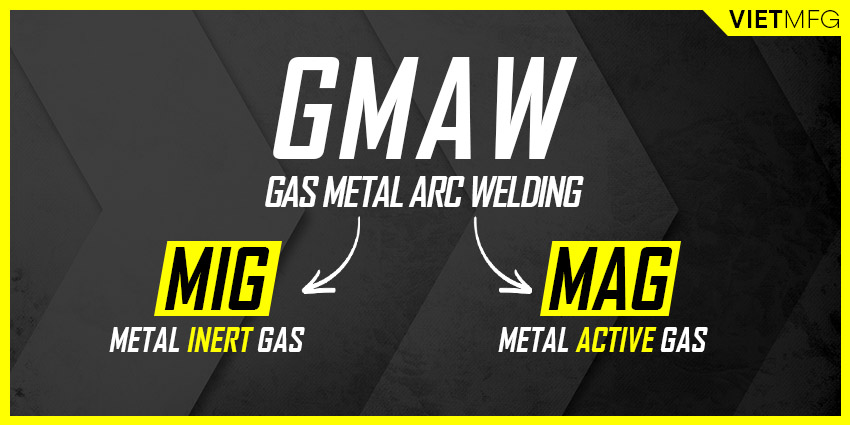
MIG process is actually one subtype of Gas Metal Arc Welding (GMAW), which mainly uses inert shielding gas to protect the molten weld pool from atmospheric contaminants.
The other subtype of GMAW, called MAG (Metal Active Gas), prioritizes the use of active gas for the weld pool protection.
Compared to MAG, the MIG process is more common and often regarded as GMAW itself.
MIG welding can be employed for various materials, including: MIG Welding Aluminum, MIG Welding Stainless Steel, MIG Welding Mild Steel (carbon steel), and other metals like magnesium, copper, nickel, etc.
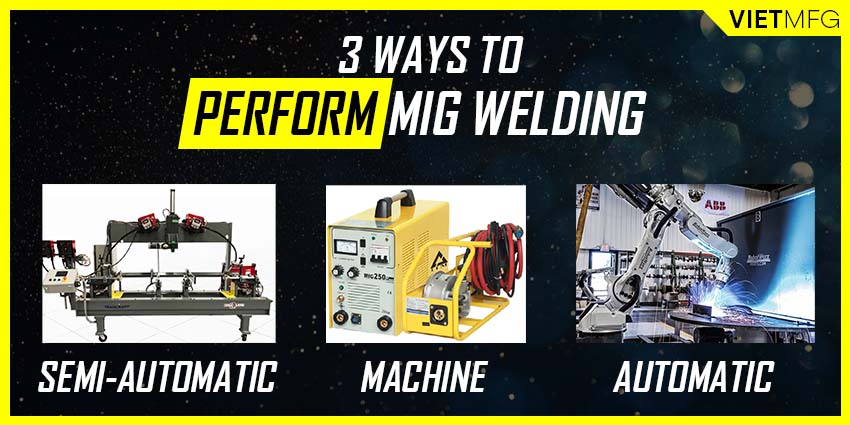
MIG process can be performed in three following ways:
- Semi-automatic MIG Welding: “Semi” here means half automation, half manual control. The automation is the electrode wire being continuously fed into the weld pool. The manual control is the spool gun’s movement being controlled by the operator (hand-held).
- Machine MIG Welding: This also features a spool gun being connected to a machine (not hand-held). In this case, the operator constantly sets up and controls the machine’s operations.
- Automatic MIG Welding: All steps are executed automatically by a machine (for example, a robotic arm for car frames welding). The operator is no longer needed in this case.
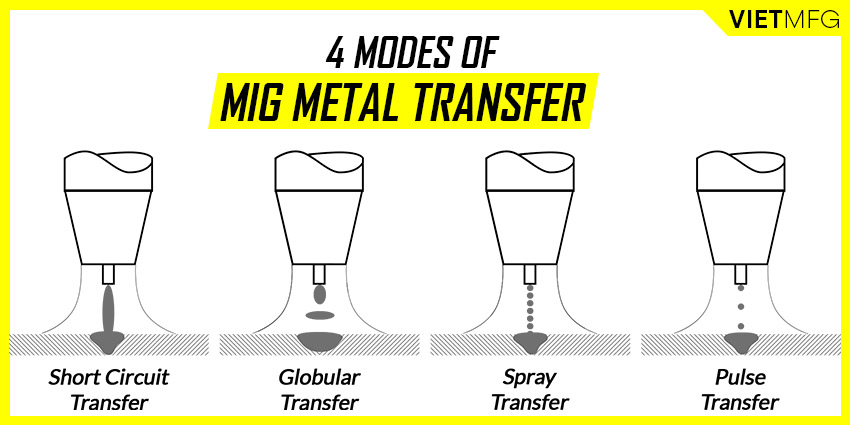
MIG Welding has four (04) modes of metal transfer:
- Globular transfer.
- Short-circuiting transfer.
- Axial Spray transfer.
- Pulsed Spray transfer (also known as GMAW-P).
Details about each MIG mode of metal transfer shall be discussed in a separate article.
2. Brief history background of MIG Welding
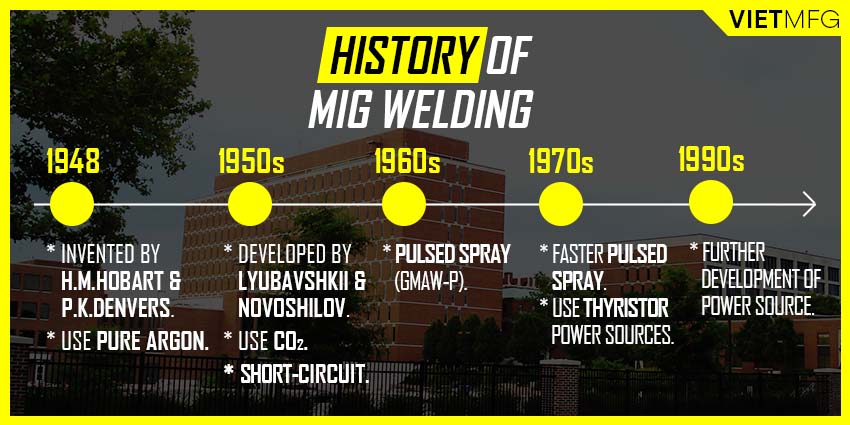
In 1948, MIG Welding made its introduction at the Battelle Memorial Institute.
The process was firstly invented by 2 researchers: H.M.Hobart and P.K.Devers, while they were using Pure Argon gas to feed aluminum wire continuously into the weld puddle.
In the 1950s, Lyubavshkii and Novoshilov further developed the MIG process by feeding large diameter steel electrodes with carbon dioxide (CO2) – a reactive shielding gas.
Also, in the same time period, enhancement of power source technology allows for the application of lower heat to weld thinner materials (short-circuit mode).
In the 1960s, further advancement in power source made pulsed spray mode (GMAW-P) possible, which helped reduce spatter and fusion defects significantly.
In the next decade of the 1970s, pulsed spray mode experienced many developments to make MIG welds more productive (faster).
One achievement of this period is the use of “thyristor” power sources to regulate the relationship between pulsed frequency and wire feed speed (Do not freak out! This will be explained in another article about MIG modes of Metal Transfer).
In the 1990s, many developments in power source technology continued to emerge, with The Lincoln Electric Company the top manufacturer of power source platforms.
Fast forward to the present, MIG welding has advanced tremendously, from the wider employment of shielding gas to the broader category of materials.
However, the core principle of the MIG process is still very much the same.
3. Application of MIG Welding
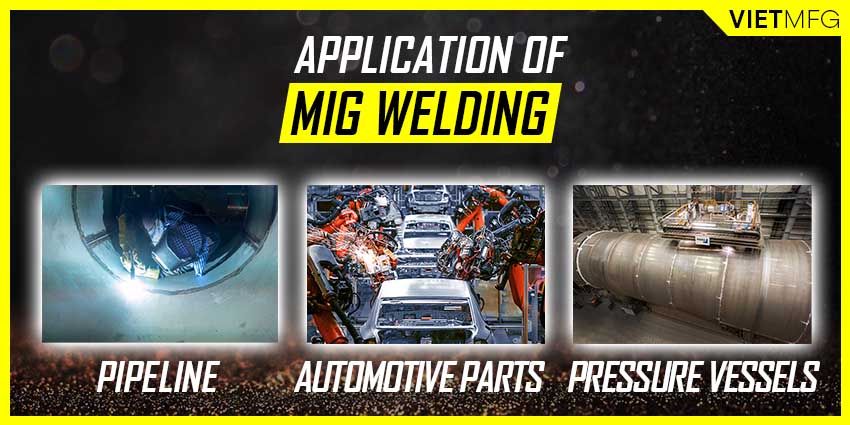
MIG Welding can be applied in various fields, ranging from agriculture, mining to construction, vehicle industries, shipbuilding, etc.
Specifically, MIG Welding is used to build pipelines, pressure vessels, automotive parts and other industrial components.
MIG Welding is also used in 3D printing of metal objects.
With the suitable selection of consumable electrode wire, shielding gases and other components, the MIG process can work well with almost all materials, in all welding positions.
4. Benefits of MIG Welding
Here are some benefits when employing MIG welding process:
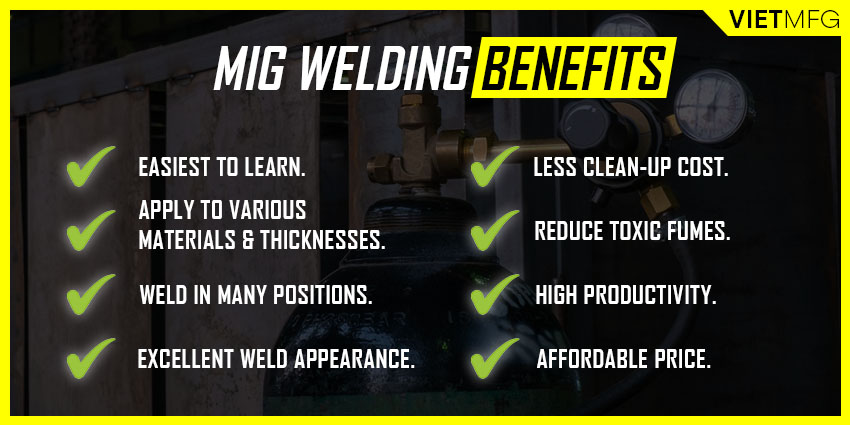
- The easiest welding process to learn out there!
- The ability to apply to various material types and thicknesses, from non-ferrous metals (aluminum, copper, nickel, etc.) to ferrous metals (stainless, carbon, etc.)
- The capability to weld in many different positions.
- The excellent appearance of weld beads created from the process.
- The minimal post-weld cleaning, thanks to the less spatter.
- The reduction of toxic fumes, compared to other welding processes.
- The high productivity obtained from MIG welding.
- The affordable prices of MIG Shielding Gas, especially the reactive types.
5. Limitations of MIG Welding
Everything has its drawbacks. Below are certain limitations of MIG Welding operation:
- The high cost for consumables, such as MIG nozzles.
- The limited use of each metal transfer mode (for example, short-circuiting mode cannot work with thin metals; axial spray mode cannot apply to thick materials).
- The application of inert gas requires bulky bottles and reduces MIG welding’s portability.
What are the components of MIG Welding?
To execute MIG welding properly, certain components (equipment) are required, including:
- A MIG spool gun.
- A consumable electrode wire.
- A power supply.
- A shielding gas supply.
1. MIG Spool Gun
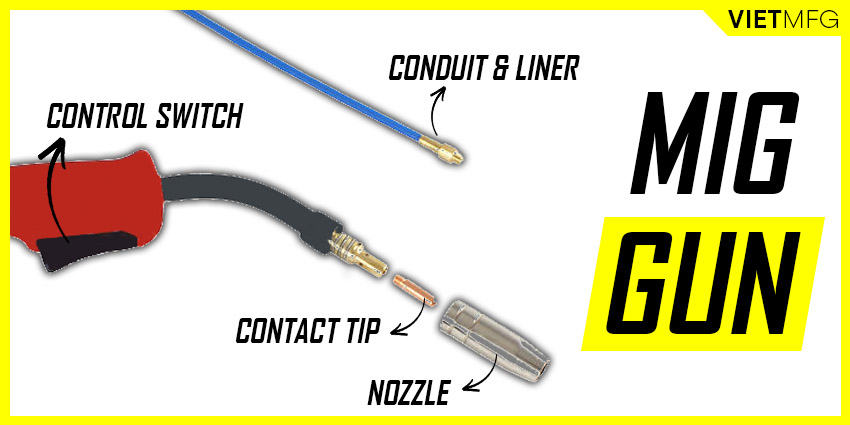
A normal MIG Spool Gun comprises the following components:
- Control switch (trigger): pressing it enables the feeding of electrode wire, the initiation of electrical current, and the flow of shielding gas to the molten weld puddle.
- Contact tip: is connected to the welding power supply via power cables to deliver electrical energy to the electrode wire.
- Electrode conduit and liner: protects the electrode wire, and helps maintain a continuous wire feed.
- Gas nozzle: directs and provides constant flow of shielding gas to the welding area.
- Gas hose: connects gas tanks to the gas nozzle.
2. Consumable Electrode Wire
Also known as MIG wire, the electrode wire is characterized by two variables:
- Alloy: refers to the metallic material that makes up the MIG wire.
- Size: refers to the diameter and thickness of the MIG wire.
The selection of a MIG wire is influenced by certain factors, including: the workpiece’s material, the joint type, the surface’s conditions, and the MIG modes of metal transfer.
Through the MIG welding process, the wire is fed directly to the workpiece under the impact of heat.
Thus, MIG wire has a significant influence on the mechanical properties of the final weld, and even determines the weld quality.
The analysis of MIG wire deserves its own separate article.
You can refer to this writing about MIG Wire Selection on our website.
3. Welding Power Supply (MIG Welder)
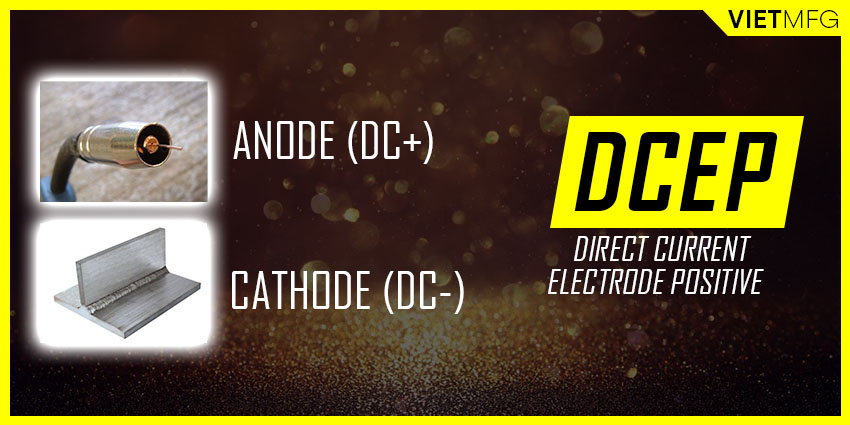
Almost all MIG projects employ a constant voltage power supply with direct current electrode positive (DCEP), with the MIG wire being the anode (DC+) and the workpiece being the cathode (DC-).
Changes in voltage results in changes in arc length, which has huge effects on current and heat input.
Lower voltage leads to shorter arc length (the distance between electrode tip and the workpiece).
This causes greater heat input, which melts the MIG wire faster and restores the arc length to the original distance.
Thus, the arc length remains consistent throughout the MIG welding process.
Furthermore, inside the MIG welder, you will find a set of rollers that helps push the MIG wire out to the spool gun.
So, if the wire is jammed for any reason, the first place you should check is these rollers inside the welder.
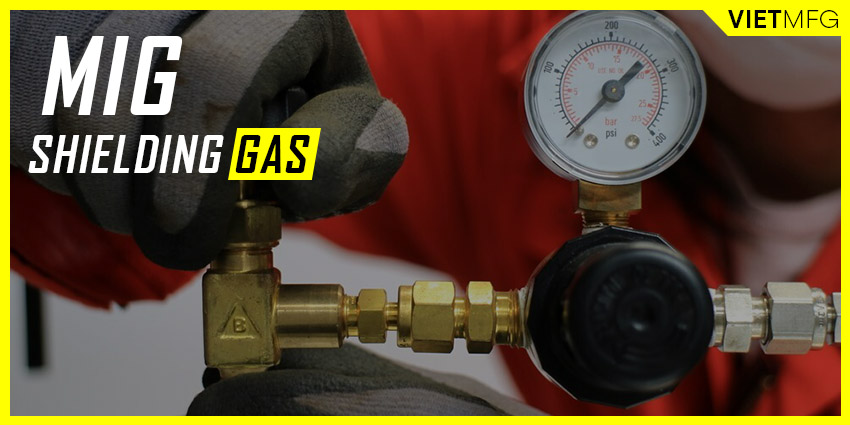
4. MIG Shielding Gas
About MIG Shielding Gas, there are so many things to discuss about in detail.
Thus, please check out all the basic things about MIG Gas in our separate article.
5. Gas Tank
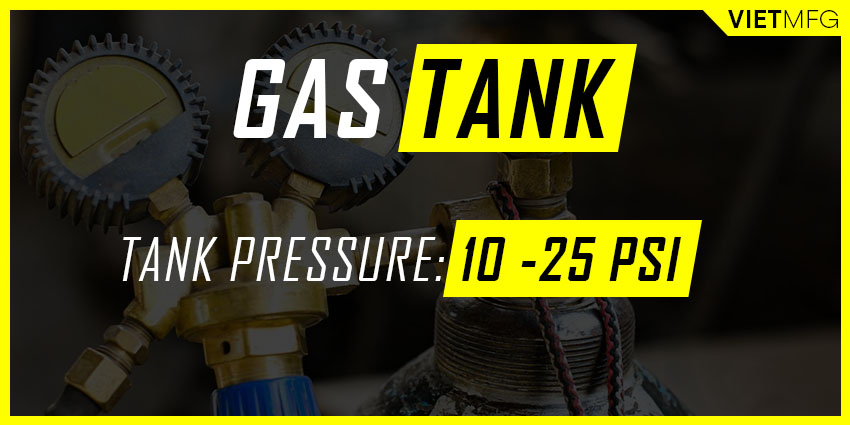
A gas tank is usually located next to where you perform MIG welding projects.
It is the safe storage of your MIG Shielding Gas.
The gas tank’s pressure should be set at around 10 to 25 psi.
6. Ground Clamp
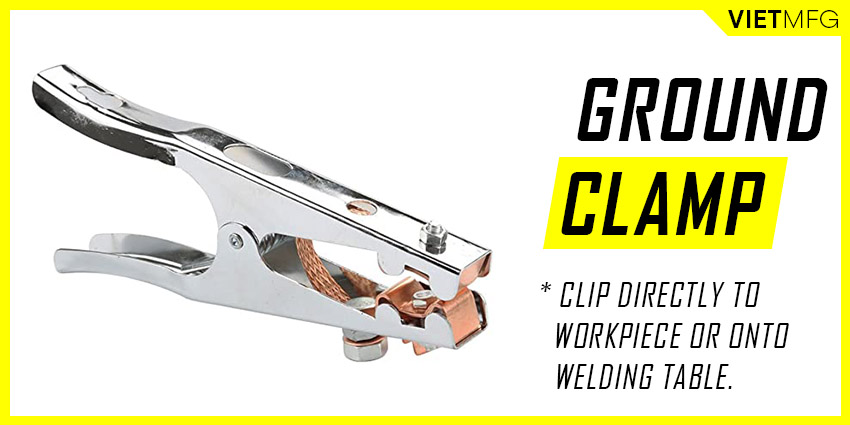
The ground clamp is the cathode (DC-) that helps complete the circuit between the MIG spool gun, the workpiece and the welder.
It is directly clipped to the workpiece, or onto the welding table.
This connection must be in good contact for the circuit to be completed.
Thus, make sure to clean your workpiece carefully and grind off any paint or rust that might harm the connection of the ground clamp.
Can we perform MIG Welding without shielding gas?
The answer is yes.
However, in such case, MIG welding needs FLUX CORED electrode wire to perform the mission of weld puddle protection (no longer BARE electrode wire).
Flux cored wire is also known as gasless wire, or self-shielding wire.
This flux layer wraps around the outside of the electrode wire.
Under the high heat of MIG Welding, this flux layer evaporates and becomes a protective CO2 shield to protect the weld puddle.
The application of flux cored wire is usually executed with DCEN setting, with the wire being the anode (DC-), which is the hotter region, for easier melting.
Flux cored MIG welding is possible for outdoor performance, and is a great start for beginners as everything about the welder’s settings are much more simple.
Basics about MIG Welding Techniques
As mentioned from the beginning, MIG Welding is a fairly simple process to learn.
A fresh starter usually needs 1-2 weeks to learn all the basic techniques required for MIG operations.
In this section, you will have all those basic materials here in one place, including:
- Why MIG Welding is considered “easy”.
- Three main task requirements for MIG operators.
1. Why MIG Welding is considered “easy”
One reason is that MIG Welding is an automated process, or at least half-automated.
This feature relieves the MIG operator from a bunch of manual tasks, such as: maintaining a consistent arc length, feeding MIG wire constantly into the weld puddle, etc.
2. Main task requirements for MIG operators
Besides setting correct MIG Welding Parameters, the main task requirements for MIG operators is to control the movements of MIG Guns.
Movements of MIG Guns are defined by 5 aspects: the stick-out distance (or contact tip-to-work distance), the work angle, the travel angle, the push-or-pull technique, and the gun’s welding patterns.
Controlling well these five aspects will guarantee you good MIG Welds.
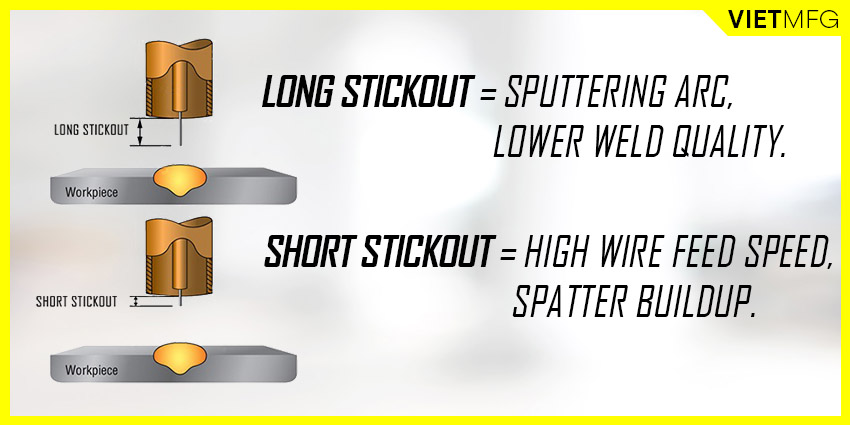
Firstly, maintaining a constant stick-out distance is critical to your MIG welding success.
- Too long stick-out will melt the MIG wire so fast that it causes a sputtering arc. Moreover, the shielding gas will disperse too quickly and lower the weld quality.
- In contrast, too short stick-out will require an increase in wire feed rate, causing spatter buildup inside the gun’s nozzle and damage the gun’s contact tip.
- Stick-out distance is determined by gas flow rate and other external factors.
- However, it is best to keep your stick-out from 0.25 inch to 0.75 inch.
Secondly, work angle (gun orientation) relative to the workpiece is also important.
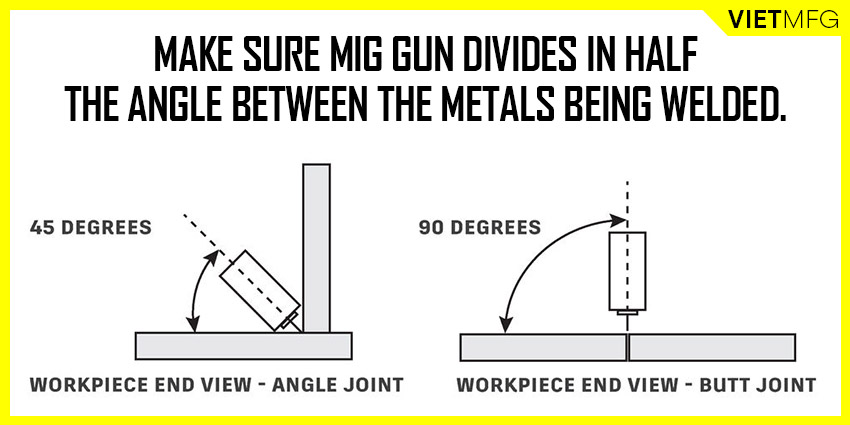
- Work angle refers to the angle of the MIG Spool Gun relative to the workpiece.
- The rule of thumb is to make sure the MIG gun divides in half (bisect) the angle between the metals being welded.
- For example, with a fillet weld (90-degree joint), the MIG gun is held at a 45-degree angle.
- Or with a butt weld (180-degree joint), the MIG gun is held at a straight 90-degree angle.
Thirdly, a challenging requirement for MIG operators is to hold the gun at a proper angle.
- Travel angle (or lead angle) refers to the angle between the gun itself and the travel direction.
- Do NOT confuse the concept of travel angle with work angle.
- Travel angle is influenced by welding position and the base materials.
- However, it is recommended to keep travel angle at 5 to 15 degrees as it minimizes spatter and increases arc stability.
- Any travel angle over 20 degrees would hurt your productivity, and cause more spatters.
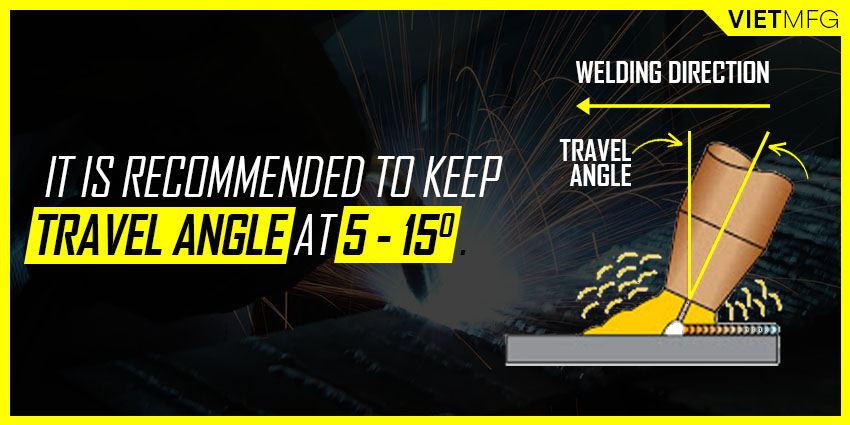
Table 01 – Work angle and Travel Angle of different welding positions.
| Welding Position | Flat | Horizontal | Vertical | Overhead |
| Work Angle | Depends on joint type | 30-60° | 90-95° | Depends on joint type |
| Travel Angle | 5-15° | Depends on base materials | 5-15° | 5-15° |
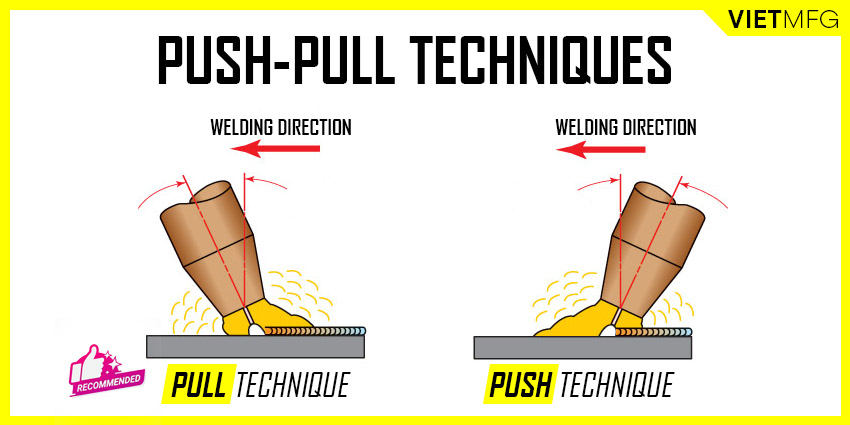
Fourthly, the selection between push or pull technique also affects the MIG weld quality.
- With the push (forehand) technique, MIG operators simply push the spool gun away from the weld puddle. This allows operators a better view of the joints, and produces a wide (yet shallow) bead.
- With the pull (backhand) technique, MIG operators point the gun towards the weld puddle, and then drag it away from the deposited metal. This creates a deep (yet narrow) penetration profile.
- Most of the time, push technique is MORE preferred in the MIG welding community.
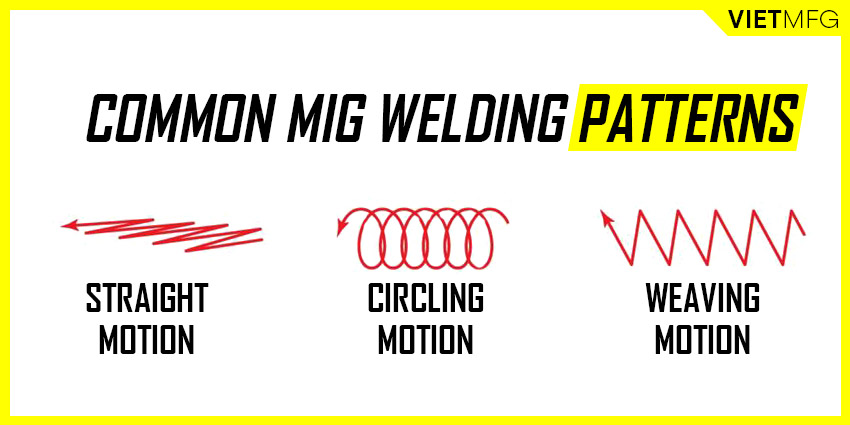
Lastly, MIG welding pattern is one more thing all MIG operators must master.
- There are 4 main welding patterns applicable for MIG process: (i) Steady motion; (ii) Whipping motion; (iii) Circling motion; and (iv) Weaving motion.
- With steady motion, it is the most basic pattern of all. Normally, it is applied for robotic automation, where all variables (gun orientation, travel angle, etc.) are preset by MIG operators.
- With whipping motion, it is simply “two steps forward and one step backward”. It helps preheat the joint before feeding the metal into the weld puddle.
- With circling motion, it looks as if you weld a small circle and move forward to repeat it. This pattern can be applied on all joint types.
- With weaving motion, you simply move the gun up slowly in a zig-zag manner, with extra emphasis on the upper section. This pattern is suitable for big joints with no distortion problems.
General step-by-step tutorial on how to perform MIG Welding
The general process of MIG Welding can be summed up in 5 sequential steps:
- Step 1: Clean the workpiece.
- Step 2: Setup the MIG Welder.
- Step 3: Conduct test runs.
- Step 4: Execute actual runs.
- Step 5: Grind down the weld (optional).
Step 1: Clean the workpiece
Just like other welding processes, spending about 5-10 minutes to clean your workpiece really helps avoid a ton of trouble later on.
Firstly, use acetone to get rid of any oil or grease on the workpiece surface.
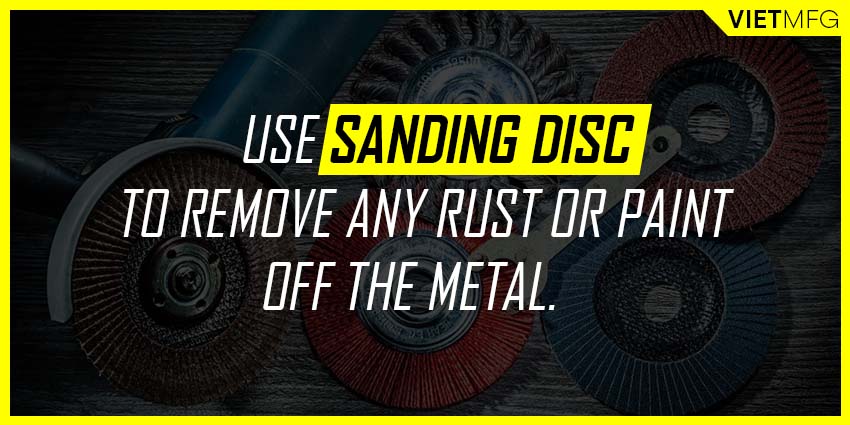
Then, use sanding discs (or non-woven abrasives) to remove any rust or paint off the metal.
Step 2: Setup all MIG Welding Equipments
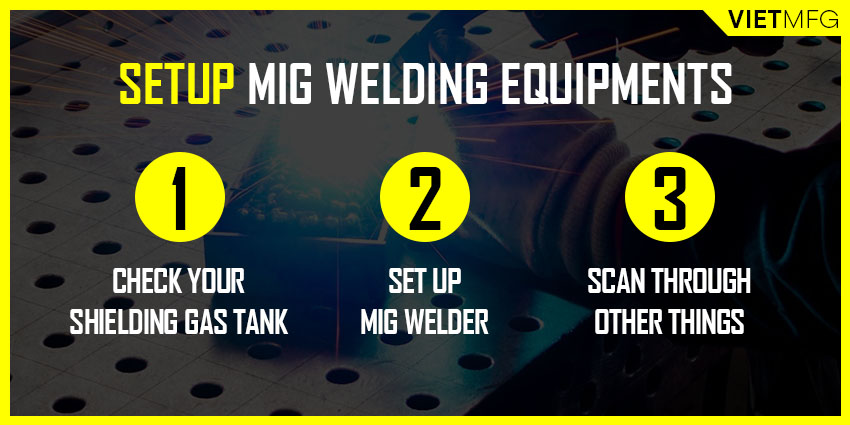
Firstly, check on your shielding gas tank.
- Make sure the valve connecting the gas tank is open.
- Adjust the gas flow rate to around 20 ft3/hr.
Secondly, set up your MIG Welder.
- 2 important settings are the voltage and the wire feed speed.
- The two settings depend on many factors like: material type and thickness, wire diameters, etc.
- Usually, there will be a guide chart located on your particular MIG Welder for your reference.
- In some advanced models, the MIG Welder even sets up these two settings automatically.
- One last note, remember to switch your current setting to DCEP for MIG Welding.
Thirdly, scan through all other things.
- Make sure the spool of wire is not tangled or stuck.
- Attach the ground clamp tightly to the workpiece or to the welding table.
Step 3: Conduct test runs
Taking a few test runs is really helpful, especially when it is your first time doing MIG welding.
You can conduct test runs on a scrap metal piece as a straight line along the surface.
Practice several times so that you get the feeling of how to adjust the welder (wire feed speed, power settings) more accurately.
- If you have a burn-through incident on your test run, you should lower your power settings.
- Or if after the test run, you see a splattered weld (not penetrate through the workpiece), then increasing your power is a must.
Moreover, be aware of the welding pattern that you will use in your actual runs, whether it is steady, whipping, circling or weaving motion.
And remember to run a bead about 1-2 inches long only, as too long a bead can make your workpiece overheat and become warped.

Step 4: Execute actual runs
Once you are confident about your test runs, then it is time to lay actual beads on your workpiece.
Keep track of how you hold the MIG gun, from the stick-out distance, work angle, travel angle to travel speed and travel patterns.
Step 5: Grind down the weld (optional)
If you do not care about your weld appearance, your MIG weld is set and done.
But if you do, then this final step can surely help you with it.
Install a grinding wheel to an angle grinder and start grinding down your welds.
Common Issues of MIG Welding
No matter how perfect your technique is, your MIG welds will surely have certain issues, as the process is affected by many external factors.
Some typical issues of MIG Welding are summarized in the following table:
Table 02 – Common issues of MIG Welding.
| NO. | MIG Welding’s issue | Results | Solution |
| 1 | Lack of shielding gas | Cause splattering arc.Discolor the workpiece to brown, green. | Increase the pressure of the gas tank. |
| 2 | Lack of power setting (voltage) | Unable to penetrate the weld puddle. | Increase your power setting on MIG Welder. |
| 3 | Too much power setting (voltage) | Burn-through your workpiece. | Decrease your power setting on MIG Welder. |
| 4 | Too much metal in the weld puddle | The weld puddle looks globy. | Slow down your wire feed rate. |
| 5 | Gun’s contact tip is too far from workpiece | MIG Gun spits and produces unconstant welds. | Hold the MIG gun closer to the workpiece (0.25-0.5 inch distance). |
Safety Guidelines for MIG Welding
Despite being a pretty safe welding process, MIG Welding can be very dangerous if it is done improperly.
Thus, following certain safety guidelines is really necessary.
In this part, we list out 5 key points that every MIG operator must stick to.
1. Wear protective clothing
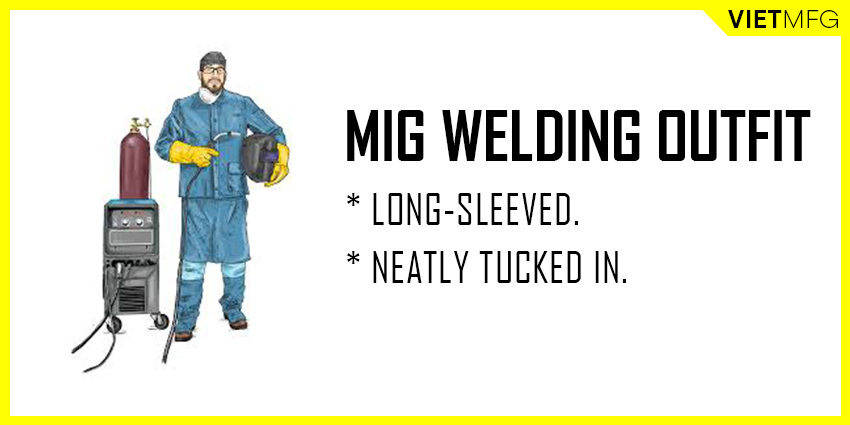
Equip yourself with suitable protective clothing, including: flame-resistant outfit, safety boots and leather gauntlets.
Firstly, the outfit must meet certain requirements.
- The outfit should have long sleeves to protect MIG operators from exposing to the spark, heat and the ultraviolet radiation from the arc (which could cause sun-burn damages to human skin).
- Make sure your clothing is neatly tucked in, as you do not want it to get caught in the grinder or any spark during the process.
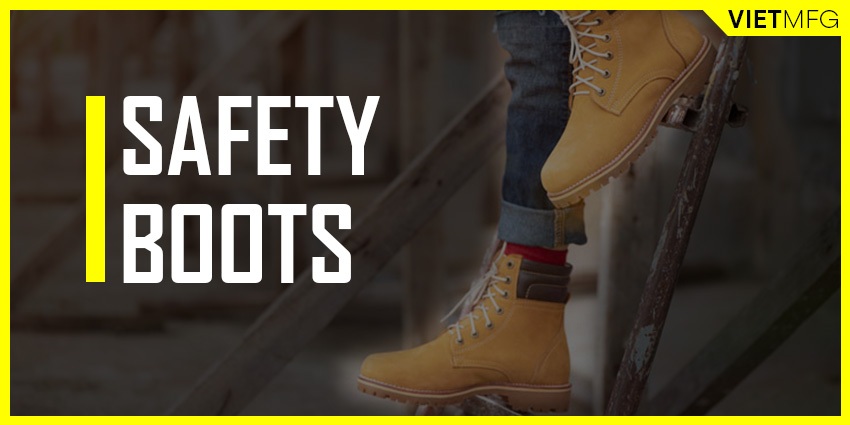
Secondly, safety boots are great protective partners.
- During MIG operation, safety boots can protect you from metal droplets falling to the ground, especially in vertical or overhead positions.
- Thus, do NOT wear open-toed shoes as those droplets can dig holes in your feet.
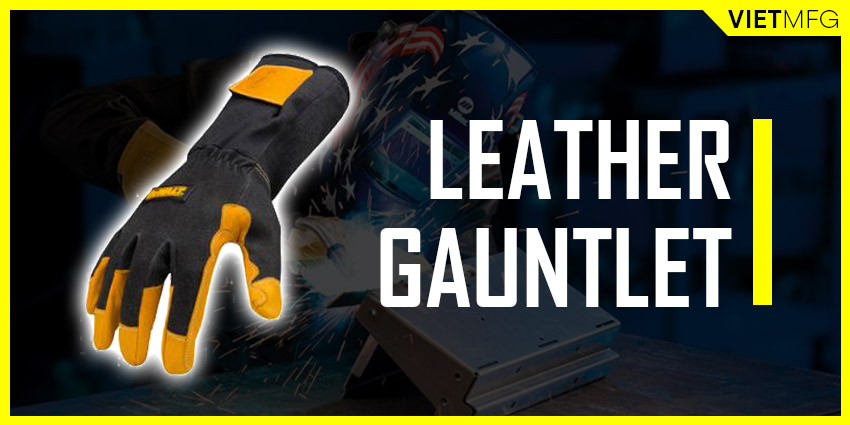
Lastly, prepare a pair of leather gauntlets (gloves).
- The gloves will protect your skin from the splattering of molten metal and the intense heat.
- For MIG welding, you can use any type of gloves that you feel comfortable.
- However, for other welding processes, thin gloves allow for greater control over your work.
2. Get a proper welding mask
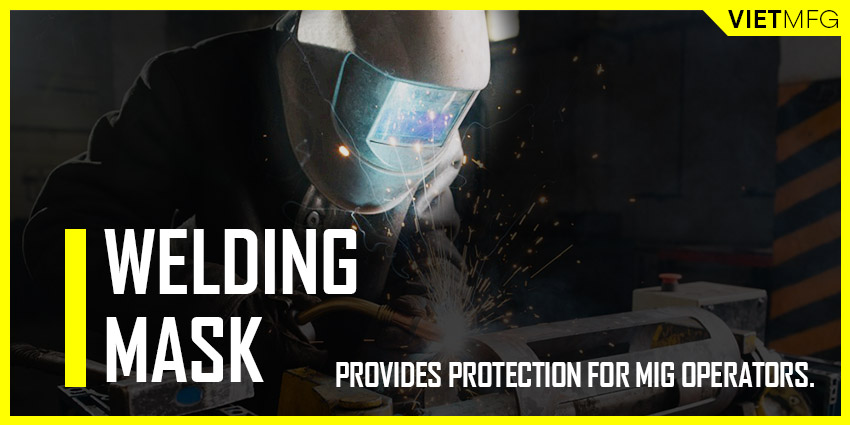
The mask must fulfil 2 functions:
- Protect your eyes from the extremely bright light from the MIG welding process.
- Provide a safe breathing system to prevent MIG operators breathing in toxic fumes.
One preferred welding mask is the auto-darkening type, which really eases the work for MIG operators.
3. Install appropriate ventilation
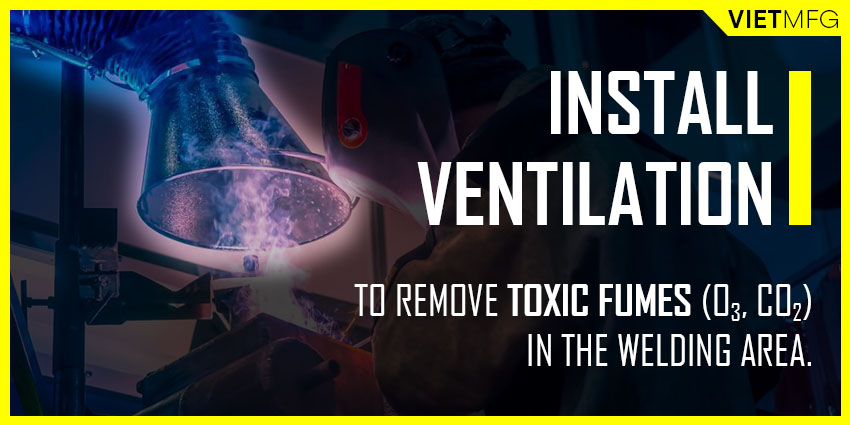
A proper ventilation system will replace toxic fumes in the welding area with clean and breathable air.
Toxic fumes are typical products produced by the MIG process, including ozone (O3) and carbon dioxide (CO2).
With them being removed, MIG operators can work safely and perform welding operations for a longer amount of time.
4. Keep your welding area clean
Because of sparks and molten metal spitting around your welding area, it is highly suggested to keep your area clean.
If such objects come into direct contact with combustible items, it could burn down the whole place.
Thus, remove any sawdust, paper, plastic bags, and even acetone (used for cleaning the workpiece) from where you perform MIG welding.
Also, keep a fire extinguisher near the exit door in your welding area.
Do NOT use CO2 extinguisher type as CO2 is a great shielding gas to promote MIG Welding.
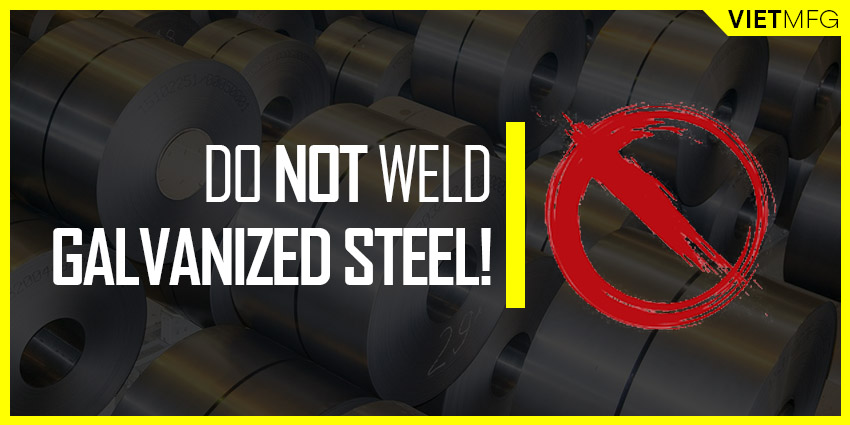
5. Do NOT weld Galvanized Steel
Galvanized Steel is a special case in which you must not perform any welding operation with it, including MIG process.
The material is electrically coated with a zinc layer whose burning produces extremely toxic gases.
The exposure to such gases can lead to welding shiver (or heavy metal poisoning), or even some permanent damages to the body.
Conclusion
Well, we have gone through every basics about MIG welding together.
We hope this “MIG Welding 101” has given you a good foundation, and brings you closer to your first MIG weld.
Reference
- Welding Principles and Practices (5th Edition) – McGraw Hill Education. Edward R.Bohnart. [2017]
- Gas Metal Arc Welding: Product and Procedure Selection – Lincoln Electric. [2014]
- Gas Metal Arc Welding. Wikipedia. Retrieved September 28th 2020.
- Gas Metal Arc Welding. ScienceDirect. Retrieved September 27th 2020.
- What is the difference between MIG and MAG? The Welding Institute (TWI). Retrieved September 27th 2020.
- How to Weld – MIG Welding. Instructables Workshop. Retrieved September 27th 2020.
- MIG Welding – The basics and then some. The Welder. Retrieved September 27th 2020.
- How to Wire Feed Weld. Welding Headquarters. Retrieved September 28th 2020.
- Is MIG Welding easy? GoWelding. Retrieved September 28th 2020.
- 7 Tips for Improving MIG Welding. Bernard. Retrieved September 28th 2020.
- MIG Welding Tips and Techniques for Beginners. Miller. Retrieved September 27th 2020.
- What is Gas Metal Arc Welding? (MIG Welding/ MAG Welding). The Welding Institute (TWI). Retrieved September 27th 2020.
- MIG Welding Technique Taught by Old Timer. Youtube (weldingtipsandtricks channel). Retrieved September 24th 2020.
- MIG Welding Basics. Youtube (Miller Welders channel). Retrieved September 24th 2020.
- Buying your first MIG welder. Youtube (Miller Welders channel). Retrieved September 25th 2020.


